Create a Google Account: Difference between revisions
No edit summary |
No edit summary |
||
| Line 12: | Line 12: | ||
<br> | <br> | ||
<br> | <br> | ||
[[File:Google Add a User.png|left|frameless|316x316px]] | |||
=== 2. Add a user === | |||
=== 2. | On the center-left side of the page, you will find the users widget. Here you'll be presented with a few options, but we are only interested in adding a user at this time. Click on the Add a user button to continue creating the new account. | ||
<br> | <br> | ||
Revision as of 08:50, 26 September 2023

1. Login to the Admin Portal
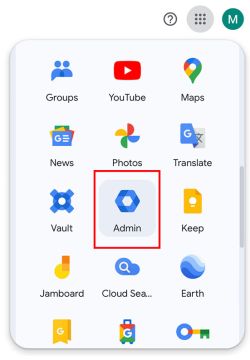
To manage accounts, we will first need to access the admin portal. To do so, visit Google's homepage and click on the menu dropdown in the upper-right hand corner. From there, look for the 'Admin' app.
To access the Admin Portal, you need to be logged in to an account with admin privileges. Double check your login to make sure you're in the correct account! The account should end in @njesd.net

2. Add a user
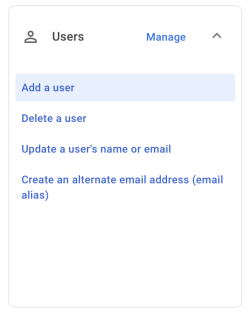
On the center-left side of the page, you will find the users widget. Here you'll be presented with a few options, but we are only interested in adding a user at this time. Click on the Add a user button to continue creating the new account.
