Clocking in to Frontline (Web): Difference between revisions
No edit summary |
No edit summary |
||
| Line 15: | Line 15: | ||
<br> | <br> | ||
[[File:Frontline clockin web 4.png|left|frameless|340x340px]] | [[File:Frontline clockin web 4.png|left|frameless|340x340px]] | ||
=== 2. Use the Time Clock === | === 2. Use the Time Clock === | ||
| Line 21: | Line 20: | ||
The specific tile we are looking for is the <code>'''Time Clock'''</code> tile. Click / tap on this tile to access the time clock. | The specific tile we are looking for is the <code>'''Time Clock'''</code> tile. Click / tap on this tile to access the time clock. | ||
<small>Your device may request to access your current location. You must allow it to continue</small> | |||
<br> | <br> | ||
<br> | <br> | ||
Revision as of 11:01, 28 September 2023

1. Access the Web Portal
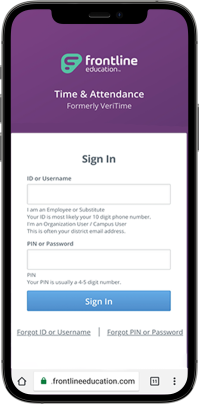
To access Frontline through the web, use their online web portal instead of the mobile app.
You can access the login page directly from any device with an internet connection.
The login page may look slightly different based on your device

2. Use the Time Clock
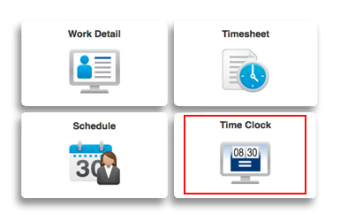
After logging in, you may see various tiles and icons on your dashboard.
The specific tile we are looking for is the Time Clock tile. Click / tap on this tile to access the time clock.
Your device may request to access your current location. You must allow it to continue
3. Add a user to the appropriate organization
From the user directory, you will need to select the appropriate organization for the new user account. There are three simple steps to ensure this is done correctly.
Selecting an org-unit for new accounts
- Click on
Users from select organizational unitsfrom the upper left side. - Find the appropriate org-unit from the list on the left and click on it to select it.
- Click on
Add new userfrom the top of the page.
4. Create the user account
When adding a new user, you will be prompted to input their first name, last name, their email address (along with the appropriate domain) and to generate a password for the account.
Please see our formatting conventions for creating Staff and Student emails in Google
5. Create a password for the account
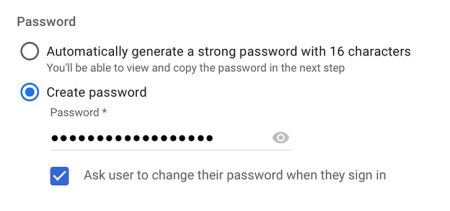
Right below the above fields is a blue link that reads Manage user's password, organizational unit, and profile photo
Click on that link to expand the password options. Upon doing so, you will be presented with the option to create a password for the new user. Click on Create password and generate a password for the new account with the Ask user to change their password when they sign in option checked.
If you a experiencing any issues, please reach out to us by submitting a support ticket.


