Adding a Folder Shortcut

1. Add a Shortcut
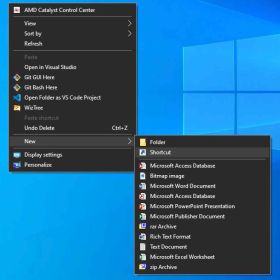
Right-Click on an empty area on your Desktop to reveal the Context Menu. From there, hover your mouse over New, and select Shortcut from the available options.

2. Set the Path for the Shortcut
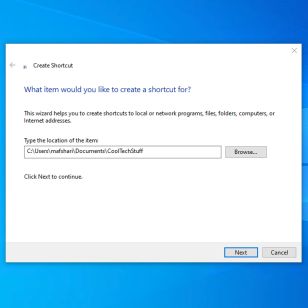
We will need to direct the shortcut to the appropriate location.
The location can be a shared network folder, like this:
\\192.168.1.100\Shared Folder
Or a path to a folder on your local machine, like this:
C:\Users\username\Documents\MyFolder
The exact path will be different depending on where your shortcut leads you.
You can utilize the Browse button to select a folder if you don't know the full path by heart.
If you need access to a specific directory, please reach out to us by submitting a ticket and we will guide you to the appropriate path.

3. Name your new Shortcut
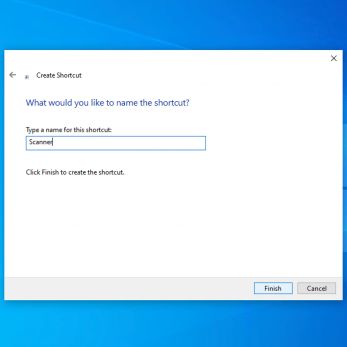
Last, but not least, give your new shortcut a unique name. This should help you identify it among your other files and folders
If you a experiencing any issues, please reach out to us by submitting a support ticket.
